
Table of Contents
- Understanding the Anatomy of a Carbide-Tipped Circular Saw Blade
- Why You Need a Circular Saw Blade Carbide Tip Replacement Guide
- Essential Tools and Equipment for Successful Carbide Brazing
- Safety Procedures and Workshop Preparation
- Step-By-Step: Removing Damaged or Worn Carbide Tips
- Preparing the Blade Pocket for New Carbide Inserts
Maintaining a professional-grade workshop requires more than just knowing how to use your tools; it involves understanding how to repair and maintain them to the highest standards. When a high-quality circular saw blade loses a tooth or suffers from chipped edges, many woodworkers and metalworkers assume the blade is destined for the scrap heap. However, with the right knowledge and equipment, you can perform precision repairs that restore your blade to its original cutting efficiency.
This circular saw blade carbide tip replacement guide is designed to take you through the intricate process of brazing new tungsten carbide tips onto your existing saw plates, ensuring you get the maximum value out of every tool in your arsenal.
Whether you are dealing with a 10-inch crosscut blade or a massive industrial ripping blade, the principles of carbide replacement remain consistent. The process involves high-temperature brazing, metallurgical understanding, and precision grinding. By mastering these skills, you not only save significant amounts of money on replacement costs but also gain a deeper appreciation for the geometry and physics that allow a circular saw to slice through dense hardwoods and non-ferrous metals with ease.
Understanding the Anatomy of a Carbide-Tipped Circular Saw Blade
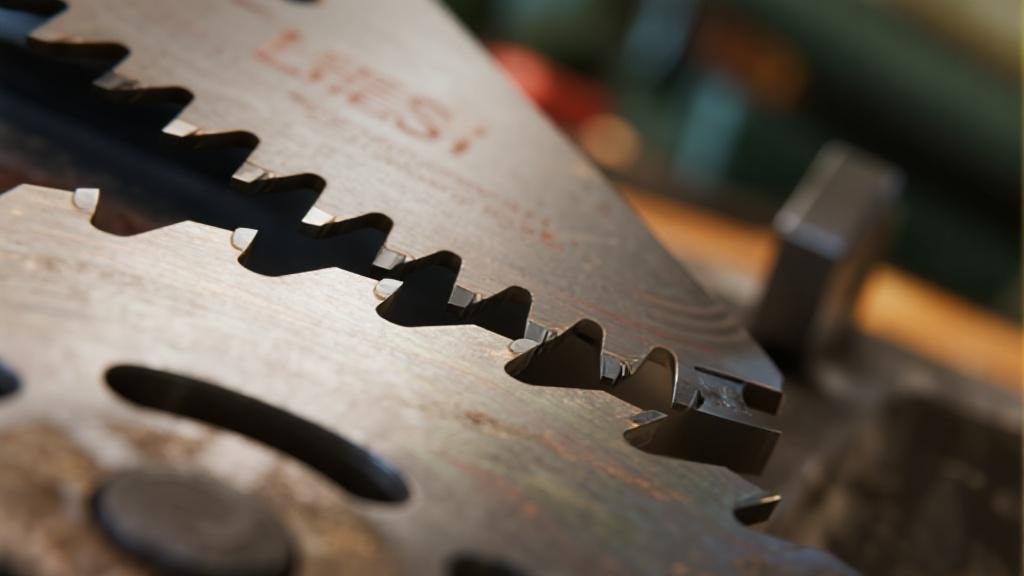
To successfully replace a carbide tip, one must first understand what makes these blades so effective. A circular saw blade is not a monolithic piece of metal. Instead, it is a sophisticated assembly consisting of a steel saw plate (the body) and individual tungsten carbide teeth attached via a process called brazing. The steel body is usually made from high-grade tool steel that has been laser-cut, hardened, and tensioned to ensure it remains flat and true under the intense heat and centrifugal force of operation.
The Role of Tungsten Carbide
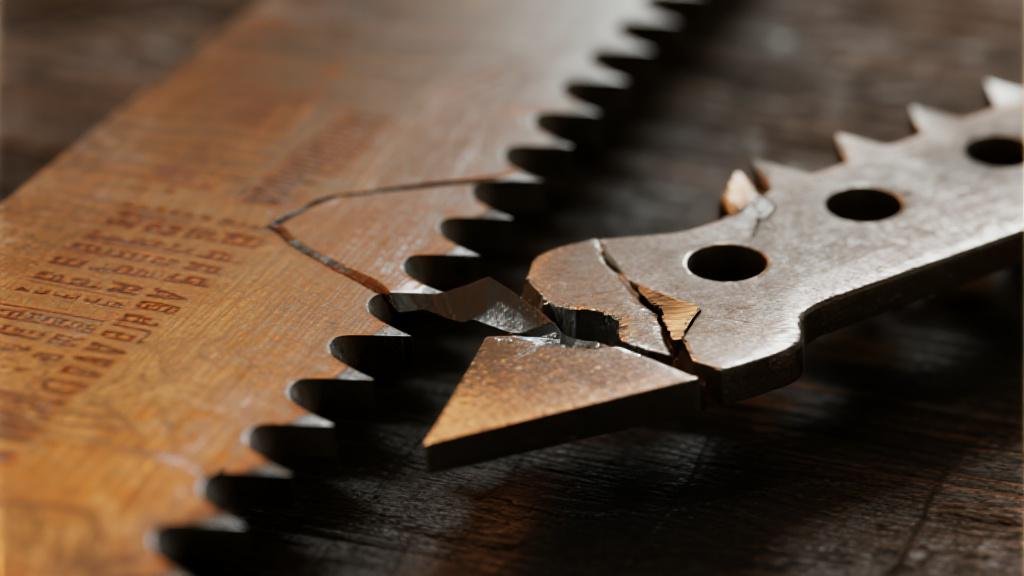
Tungsten carbide is a “cermet”—a composite material consisting of ceramic particles (tungsten carbide) bonded together by a metallic binder, usually cobalt. This combination results in a material that is significantly harder than standard tool steel, allowing it to maintain a sharp edge for hundreds of hours of cutting. However, this hardness comes at the cost of brittleness. If a carbide tip strikes a nail or a hard knot at high speed, it is prone to fracturing rather than bending.
Tooth Geometry and Kerf
Each tooth on a saw blade is ground to a specific geometry. Common grinds include Alternate Top Bevel (ATB), Flat Top Grind (FTG), and Triple Chip Grind (TCG). When you are following a circular saw blade carbide tip replacement guide, you must identify the specific grind of your blade. The “kerf” refers to the width of the cut made by the teeth, which is always wider than the saw plate itself to prevent binding.
The Brazing Interface
The area where the carbide meets the steel is known as the “pocket” or “shoulder.” This interface is critical because steel and carbide have different rates of thermal expansion. To prevent the tip from cracking during the cooling process or flying off during use, a specialized silver solder (brazing alloy) is used. This alloy acts as a shock absorber, providing a flexible yet incredibly strong bond.

Why You Need a Circular Saw Blade Carbide Tip Replacement Guide for Your Workshop
You might wonder why anyone would go through the trouble of replacing individual tips when new blades are readily available. The answer lies in both economics and quality. High-performance blades from manufacturers can cost anywhere from $100 to $300. If such a blade loses a single tooth, discarding the entire blade is an expensive waste.
- Economic Benefits: The cost of a single carbide tip blank and silver solder is often less than two dollars.
- Customization: Gain the ability to install harder grades of carbide for specialized tasks or modify tooth counts.
- Sustainability: Repairing what you already own reduces the demand for raw materials and keeps high-quality steel out of landfills.
Essential Tools and Equipment for Successful Carbide Brazing
Brazing carbide is a precision task that requires localized heat and specialized materials. You cannot simply use a standard soldering iron; the temperatures required are significantly higher.
Heating Sources: Torches and Induction
The most common method for DIY carbide replacement is using an Oxy-Acetylene or MAPP gas torch. You need a concentrated, high-temperature flame to heat the steel shoulder quickly without overheating the rest of the blade. For higher-volume shops, induction heating units are preferred for superior control.
Brazing Alloys and Flux
The “glue” that holds the carbide to the steel is a silver-based brazing alloy. Specifically, look for “tri-metal” or “sandwich” solder. This consists of a layer of copper sandwiched between two layers of silver solder, allowing it to absorb thermal stresses.
Safety Procedures and Workshop Preparation
Working with high-temperature torches and hazardous materials requires strict adherence to safety protocols. This guide prioritizes your well-being above all else.
- Ventilation: Brazing flux can release toxic fumes. Always work in a well-ventilated area or use a fume extractor.
- Eye Protection: Use “shade 5” brazing goggles to protect against infrared and ultraviolet light.
- Fire Safety: Ensure your workbench is non-flammable (firebrick or steel) and keep a Class ABC fire extinguisher nearby.
Step-By-Step: Removing Damaged or Worn Carbide Tips
The first physical step is the removal of the old carbide. This must be done carefully to avoid damaging the steel pocket, which provides the foundation for the new tip.
Localized Heating and Extraction
Position the blade in your vise so the damaged tooth is facing upward. Apply a small amount of flux to the joint. Using a small, concentrated flame, heat the steel shoulder just behind the carbide tip until it reaches a dull cherry-red color. Once the silver solder liquefies (1,100°F to 1,300°F), use ceramic-tipped tweezers to gently slide the tip out.
Pro Tip: Never quench a saw blade in water. The rapid temperature change will ruin the tempering of the steel and cause the plate to warp.
Preparing the Blade Pocket for New Carbide Inserts
Preparation is 90% of the work. If the surfaces are not chemically clean, the silver solder will not “wet” the metal, resulting in a weak bond.
- Mechanical Cleaning: Use a fine-grit abrasive to ensure the seat is perfectly flat.
- Chemical Degreasing: Use acetone or denatured alcohol to clean both the steel pocket and the new carbide tip.
- Applying Flux: Apply a fresh layer of brazing flux. It acts as a temperature indicator, turning from paste to clear liquid when the alloy is ready to melt.
| Carbide Grade | Cobalt Content | Hardness (HRA) | Best Application |
|---|---|---|---|
| C1 | 10-12% | 89.0 – 90.5 | Heavy impact, construction lumber with nails |
| C2 | 8-10% | 90.5 – 91.5 | General purpose woodworking, ripping and crosscutting |
| C3 | 6-8% | 91.5 – 92.5 | Precision finishing, hardwoods, and MDF |
| C4 | <6% | 93.0+ | Industrial use, non-ferrous metals, extreme wear resistance |